There is a known bug in NI’s CVI (and apparently LabVIEW) products that makes the user interface misbehave when the PC is connected to multiple monitors that have different scale settings: https://knowledge.ni.com/KnowledgeArticleDetails?id=kA00Z0000004AZ9SAM


The “solution” mentioned in the article is to have the same scaling factor for all monitors or disable the scaling of the specific applications. That might have been (almost) reasonable in 2016, when this issue first came up and different scaling was probably just a misconfiguration, but in times where an external monitor might be high-DPI (and thus needs a high zoom factor) and the other one is e.g. a normal laptop display, this is not possible. Furthermore, if it only affected the development computers, ok, but to tell all my users(!) to “change your Windows settings for my app to work correctly” is downright embarrassing and reflects badly on me as a developer.
Thus, I filed a bug report with NI, and after apparently much deliberation it was returned as WONTFIX, as there are the workarounds mentioned above. Let me repeat: embarrassing.
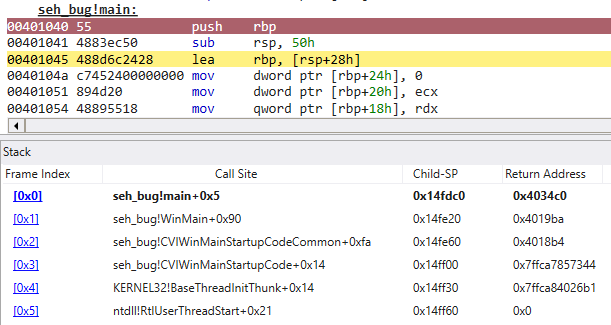
So I once again got out my trusty disassembler and investigated this issue myself. Spoiler alert: it’s easy to fix, even without patching the runtime code.
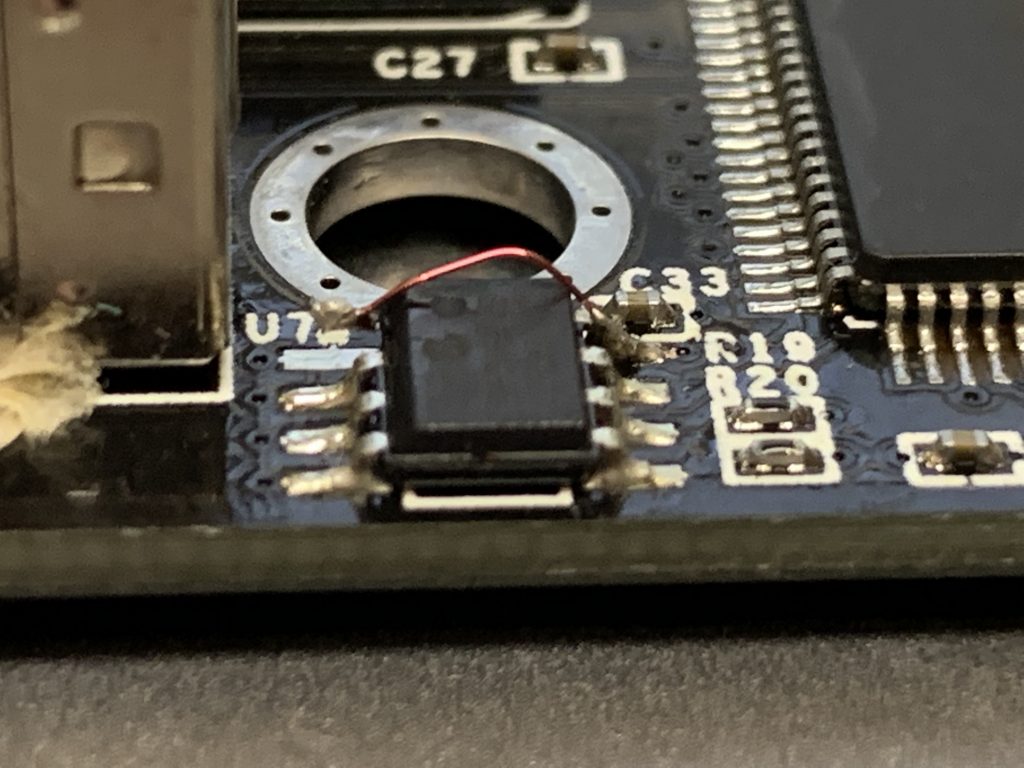
The basic problem is that the CVI runtime employs a window, hidden away at coordinate 25000×25000, for some of its tasks. This has often be a source of trouble because its creation happens before my main() function is invoked, which can have many undesired side-effects I won’t go into at this point. Anyway, this hidden window seems to adapt the scaling factor of the “nearest” monitor and as long as the app is on that monitor, everything is fine, but if it’s on a different one, hilarity ensues.

The problem now is that, when a menu is created, the hidden window is given as its parent instead of the window the menu actually belongs to 🤷♂️! The menu then adopts the scaling of the hidden window, no matter which monitor it is actually on, and things start to break. This should be trivial to fix in the runtime, but as I don’t feel like binary patching and distributing a hacked runtime, maybe we can do better.
I found out that, when I hide the window (by actually marking it “not visible”, not just by moving it out of the way), Windows doesn’t adopt the scale of the hidden window but takes the scale of the monitor the new window actually appears on! Bingo, that’s what we want! The only caveat: CVI uses the hidden window for the taskbar button, so we lose that. Uh-oh, not good! But fear not, there is an easy way to make the actual (visible) main window get a button instead, so the solution in the end is fairly easy with (so far) no negative side effects:
#include <windows.h>
[...]

// Workaround for multi-monitor DPI scaling issues with CVI (mainly menus not appearing where they should be):
// CVI apps have a hidden main window at position 25000x25000, so always out of view and it uses this window
// as the parent for any menu that is shown. Unfortunately, the hidden window adopts the DPI scaling of the
// nearest monitor and inherits it to the new window. That's fine if the new window is on that monitor, but if
// it is shown on a monitor with different DPI scaling then nothing fits anymore, it's drawn too big/small and
// at the wrong location.
//
// By just removing the WS_VISIBLE style of the (anyway hidden) window Windows changes its behaviour
// completely and the new window adopts the DPI scaling of the monitor where it is actually positioned.
//
// Caveat: the hidden window is used for the taskbar button. If we hide that, we get the proper DPI behaviour,
// but no taskbar button! So, as a further workaround, we enable the ES_EX_APPWINDOW style on the ACTUAL main
// panel below, which will then get its own taskbar button, with an even better working preview!
SetSystemAttribute(ATTR_TASKBAR_BUTTON_VISIBLE, 0);

[...]

if ((panelHandle = LoadPanel(0, "demo.uir", PANEL)) < 0)
	return -1;

// Second part of the DPI fix above, let's give our main window a taskbar button after all
HWND hwnd;
GetPanelAttribute(panelHandle, ATTR_SYSTEM_WINDOW_HANDLE, (intptr_t*)&hwnd);
SetWindowLongPtr(hwnd, GWL_EXSTYLE, GetWindowLongPtr(hwnd, GWL_EXSTYLE) | WS_EX_APPWINDOW);
As you can see, the workaround consists of only 3 lines of code. After including those, everything works as expected, menus draw consistently at the size and position they are supposed to show up, no matter the monitor configuration or monitor they are on.
All in all it took me less than a day to figure all this out, it was almost less work than filing and seeing through the bug report mentioned above (my support contact was very dedicated and determined, but in the end as helpless as me when R&D says they don’t want to fix it). NI on the other hand has listed this as a known issue for 8 years, and they have the source code! But I’ve heard these are very tumultuous times for them after the acquisition, I wish everybody the best and hope that someday they can correct course and maybe return to their old form. Long live CVI 😉