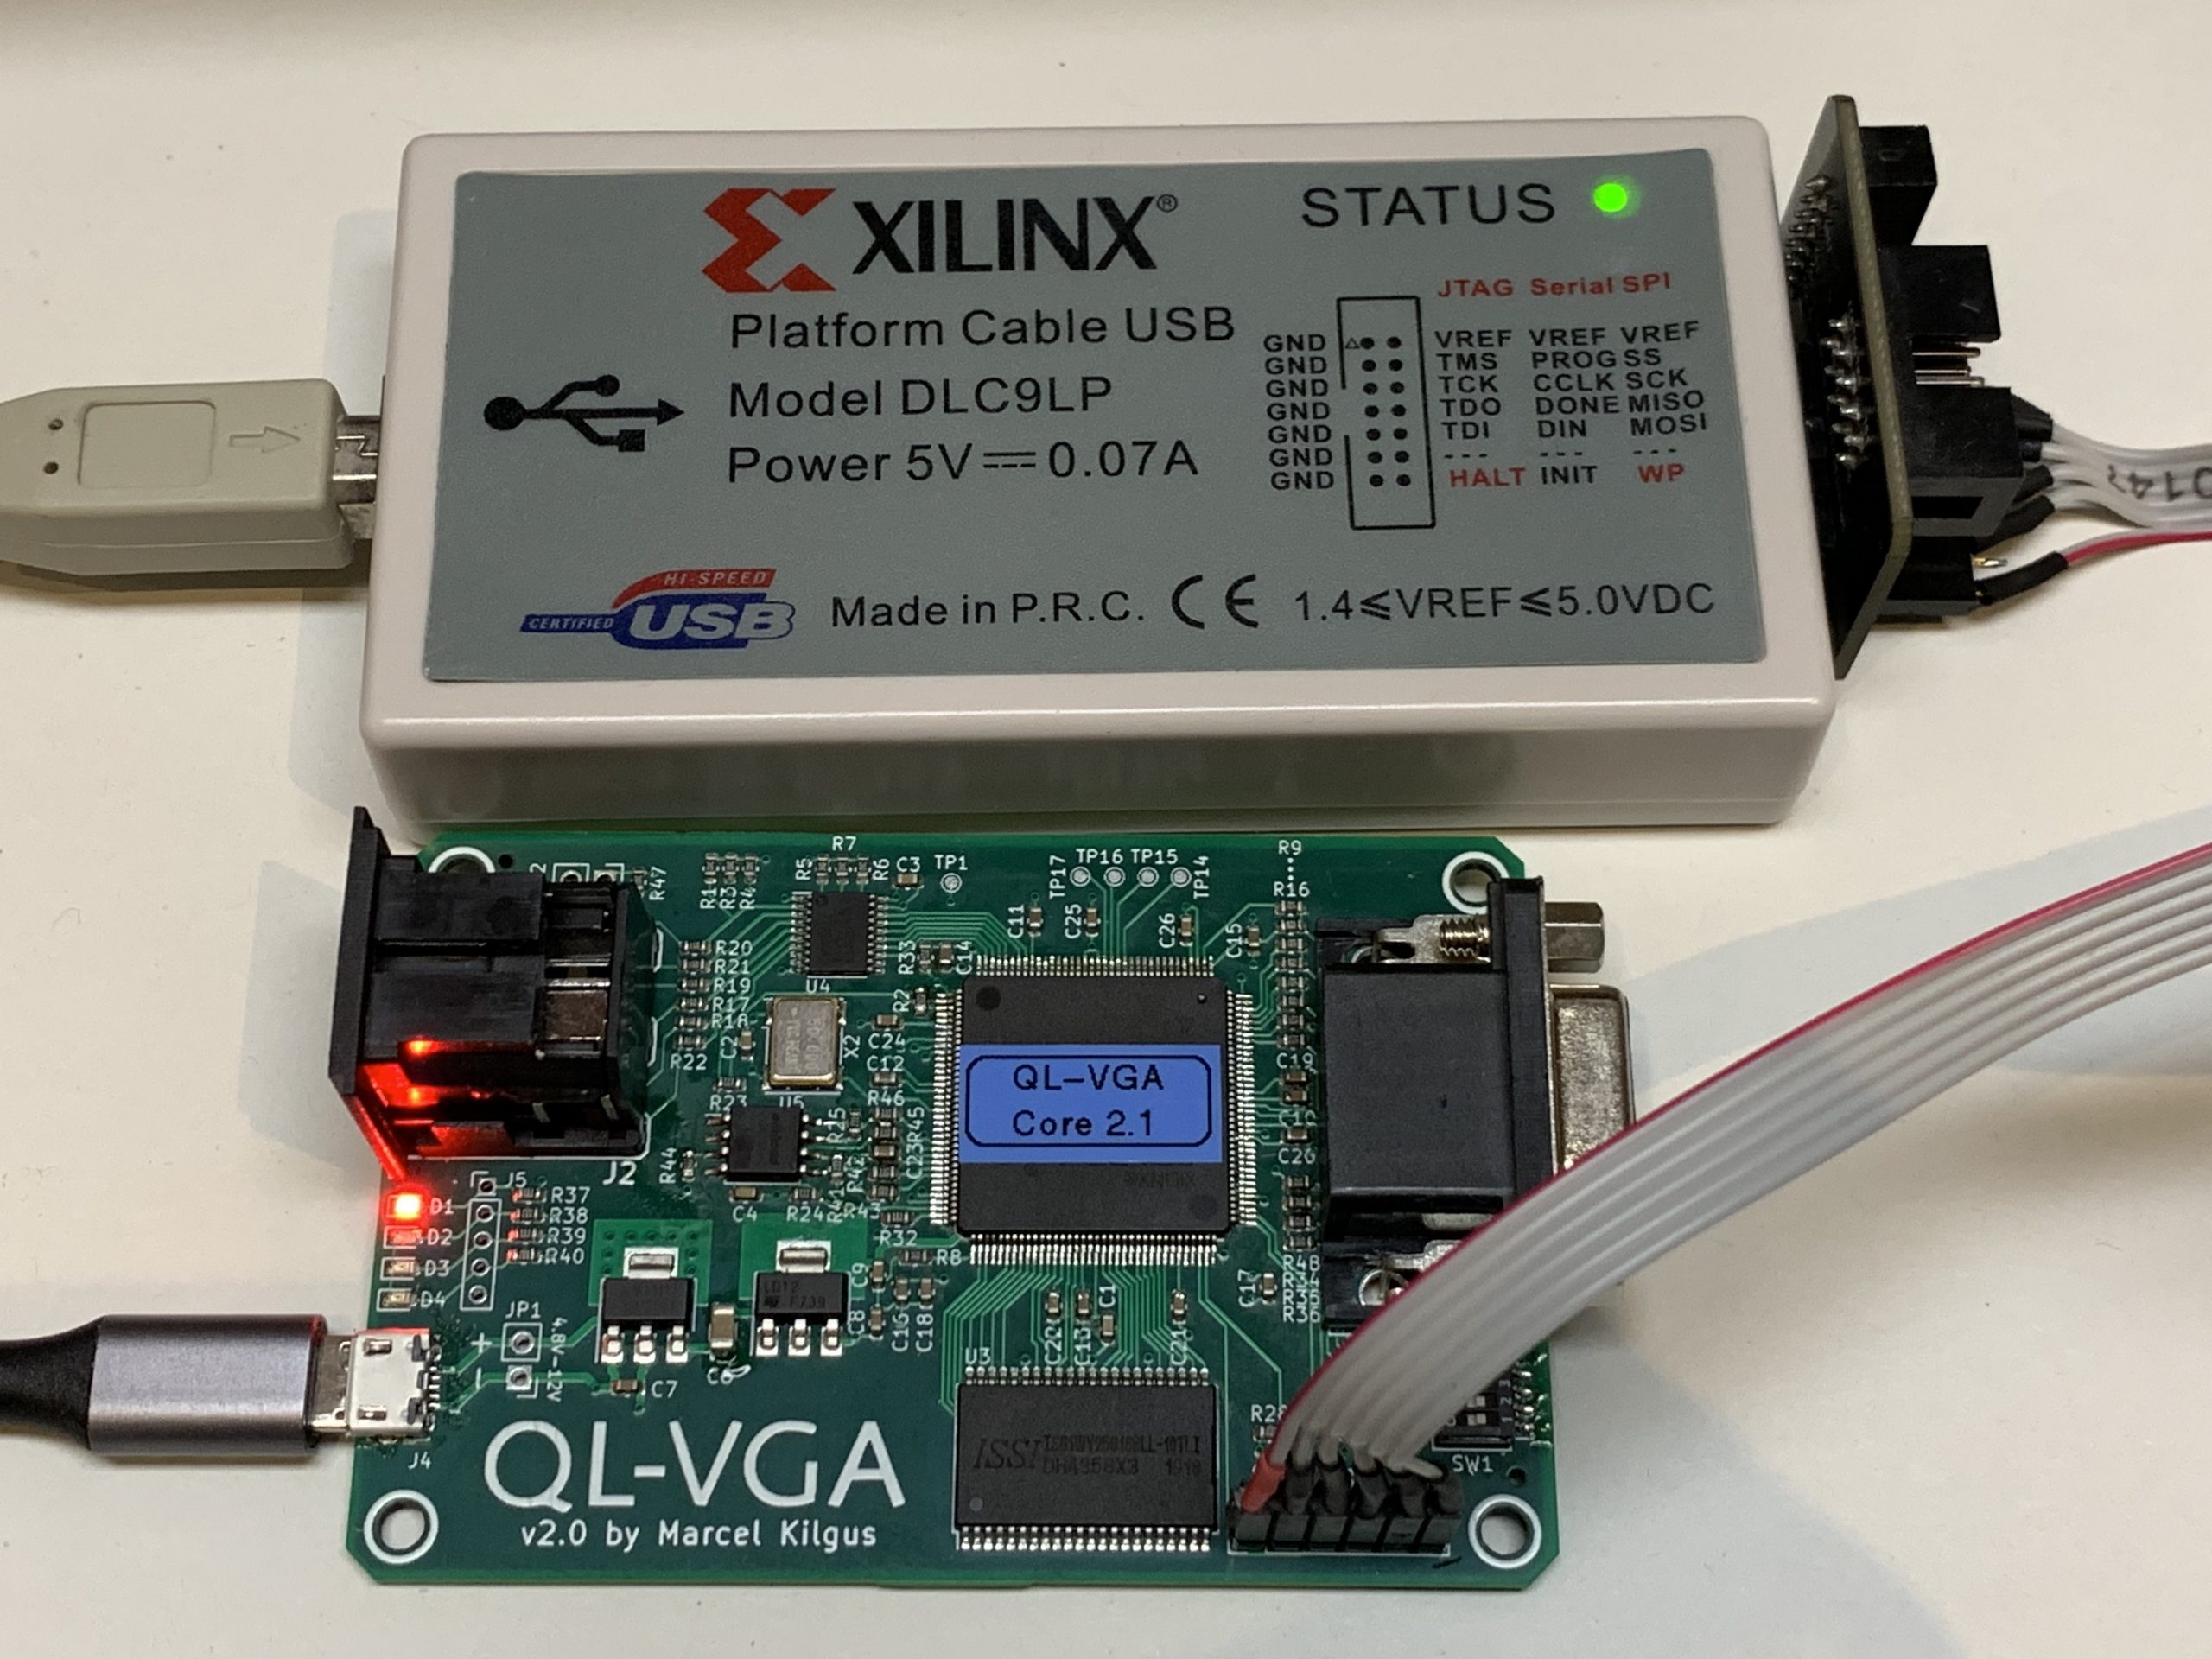
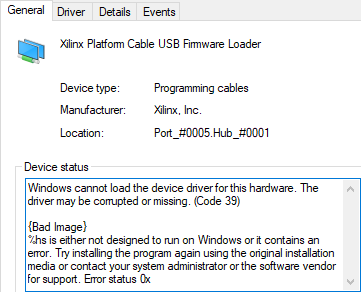
Both my QL-VGA2 and QL-SD ROM hardware use Xilinx chips and to program these I have a Xilinx USB JTAG cable model DLC9LP. After months of inactivity I dusted it off to update a few remaining QL-VGA boards but found that the cable didn’t work anymore with my main laptop: Code 39!? Drat.
Googling that didn’t turn up much useful advice, but the adapter still worked on an older laptop, so it wasn’t the USB device per se. And the next generation USB cable was sufficiently expensive (>300€) that I wasn’t about to just give up, so in the rabbit hole I went.
TLDNR: A quick fix is to disable Windows’ “Device Guard” feature, for a more thorough fix read on. “Device Guard” can for example be disabled by setting the “Enabled” key in HKEY_LOCAL_MACHINE\SYSTEM\CurrentControlSet\Control\DeviceGuard\Scenarios\HypervisorEnforcedCodeIntegrity to 0.
Long story
The USB cable has a somewhat unusual boot process. The integrated CY7C68013A microcontroller comes with a default firmware that presents itself as an USB device with the sole purpose of loading the real firmware into RAM (shown as the “Xilinx Platform Cable USB Firmware Loader” device). This is the job of the xusb_xlp.sys driver from Xilinx. Once the firmware is uploaded the cable detaches and comes back as a new USB device called “Xilinx USB Cable”, backed by the more common windrv6.sys Jungo driver.
Reversing the driver
The problem is that the xusb_xlp.sys driver is not compatible with Windows’ “Device Guard” feature. So as a first step I tried to reverse the source code of the driver. I first loaded it into my trusty IDA Pro disassembler, but unfortunately I don’t have a license for the even more expensive decompiler and reversing everything from assembler is a not too enjoyable task. So I tried another thing and also loaded it into NSA’s Ghidra tool, which I find pretty cumbersome to use but is free and includes a decent decompiler.
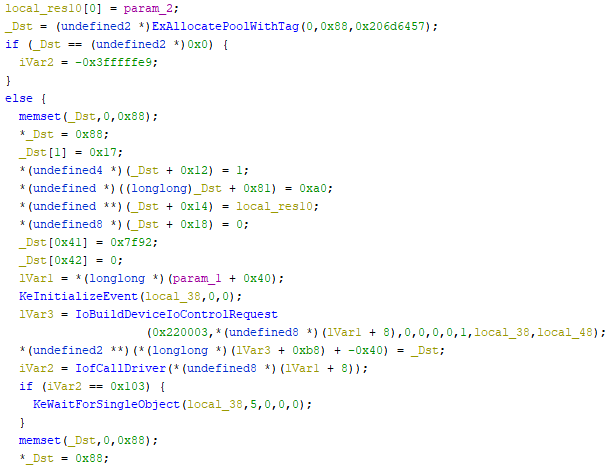
So this makes things a little bit easier, but it was still a challenge that can be compared to putting together a 10000 pieces puzzle, especially as I’ve never dabbled in Windows driver development before. Here’s a typical example of the process (all pictures display the same piece of code, click the image for a bigger view):


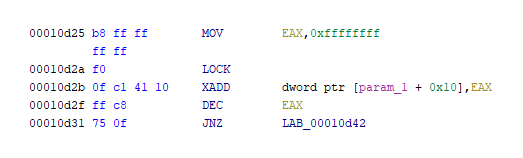
So Ghira helped a lot, though in some cases the decompiled code is actually less readable than the simpler assembler source, like in this example:


Well, in the end I had a fully reversed and re-compilable source code but only then noticed that this is more or less useless: even if I fixed all problems, on the latest Windows 10 releases all kernel drivers must be signed by Microsoft. And not only that, while I do have a valid code signing certificate for Windows I’d need the much more expensive “Extended Validation” certificate (>400€ per year)… so, while this was an interesting challenge, it was also technically a dead end. At least I learned a lot from it. For the curious souls I have attached the code (untested!): xusb_xlp.zip
Fix through firmware mod
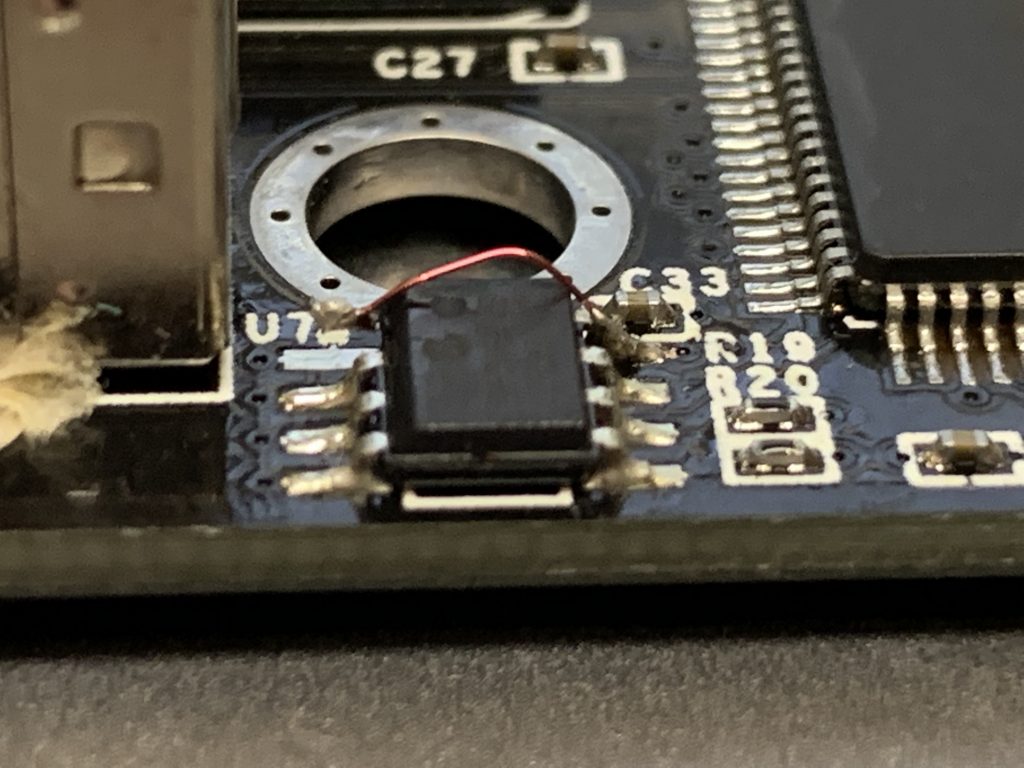
The advantage of the double-boot was that the firmware could easily be changed by releasing a new driver. But, seeing that the firmware hasn’t changed for over 8 years I think it’s save to say that this was it. So, after reading a few datasheets, I found another solution: the CY7C68013A can also load its firmware directly from an attached EEPROM, provided it’s big enough. In my case it wasn’t (24LC02 = 256 bytes), but that could easily be remedied by ordering some cheap 24LC64 (= 8kB) chips. After the order I realized that while the raw firmware binary is <8kB, the bootloader form as extracted from the driver has enough overhead to take this to 10kB. But after some recoding of the binary I was able to compress this back down under the 8kB limit, pheeew, otherwise I would have wasted 4€ and have to make another order for some 24LC128 😉
So, when the chips arrived I put one into my trusty TL866A programmer and programmed my firmware binary directly into it (there is probably also a way to program the EEPROM in-circuit through the microcontroller with the Cypress SDK, but this way was easier for me). I then exchanged the 24LC02 with the programmed 24LC64. The only problem is that bigger EEPROMs must have pin A0 set to high according to the CY7C68013A datasheet, so a little tweak was needed in my adapter for pin 1:
And voilà, plugged it into the PC and it went directly to the windrv6.sys driver, which works fine even with “Device Guard” enabled. Bingo, mission accomplished! It was much work and a long journey, but